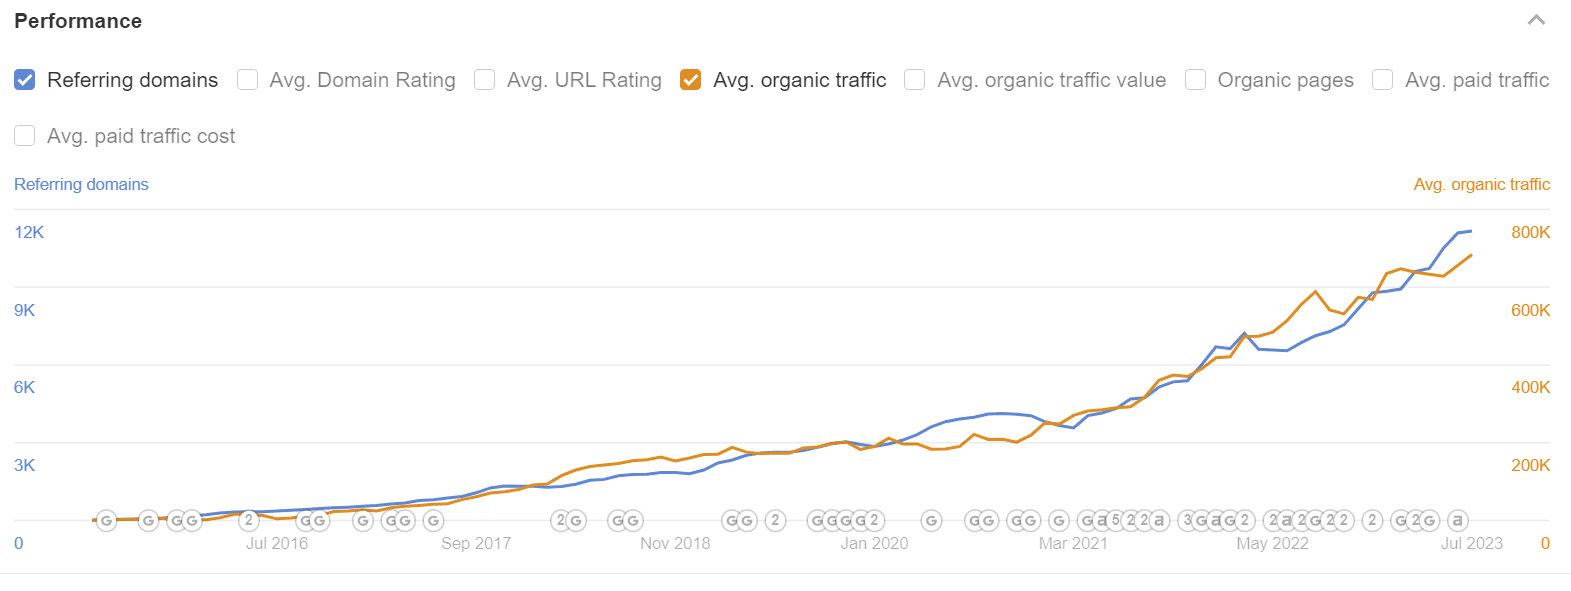

Poor attribution is a common challenge among in-house marketers, especially when it comes to knowing whether content-based efforts result in conversions to demos and trials.
Many existing resources on GA4 conversion tracking simply outline the process of establishing conversion events. However, understanding conversions requires more than just event setup; it involves creating and configuring proper event reporting to have proper attribution in place.
This guide intends to address the setup of conversion events and the importance of utilizing multiple attribution models and accessing reports that offer a well-rounded view of conversion data, and is broken out into three core parts:
Most marketers already have the first point configured, but they really struggle when it comes to creating actual reports that properly show and attribute conversions from content. Feel free to jump ahead to the second section if you’re confident that you already have properly configured conversions in GA4 but you’re stuck on attribution and having clear reporting.
By the end of this guide, you’ll have a proper GA4 setup that clearly shows and attributes conversions against your content.
Setting up conversion events in GA4 involves precise steps to ensure accurate tracking of user interactions on websites and apps.
GA4 replaces Universal Analytics’ concept of “goals” with conversion events, which are more flexible in defining users’ key actions.
Below is a detailed guide to creating and configuring these events in GA4:
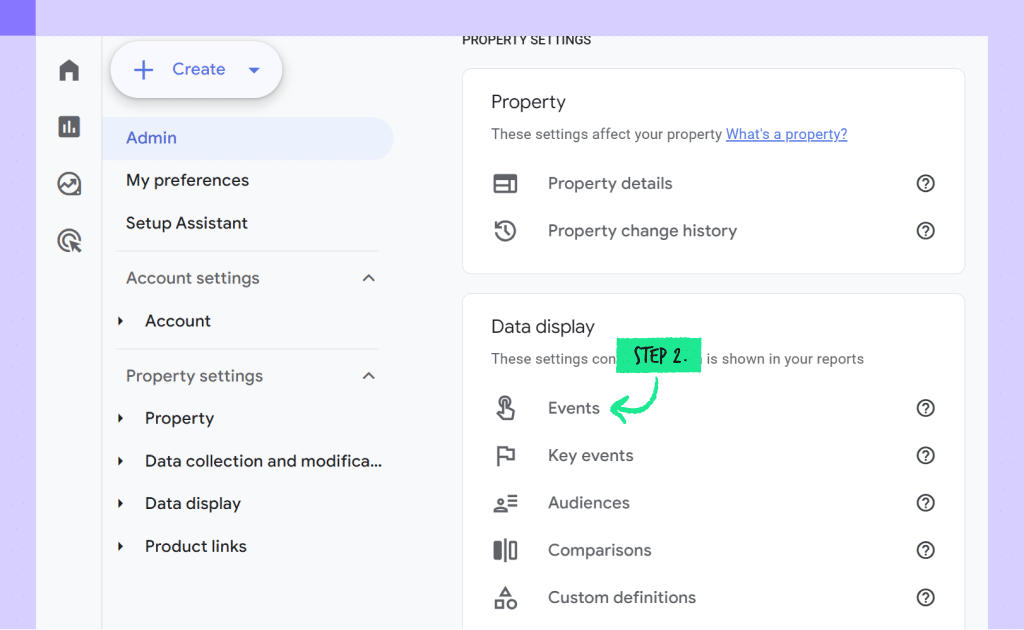
Step 1: Navigate to the GA4 Admin panel at the interface’s bottom-left corner.
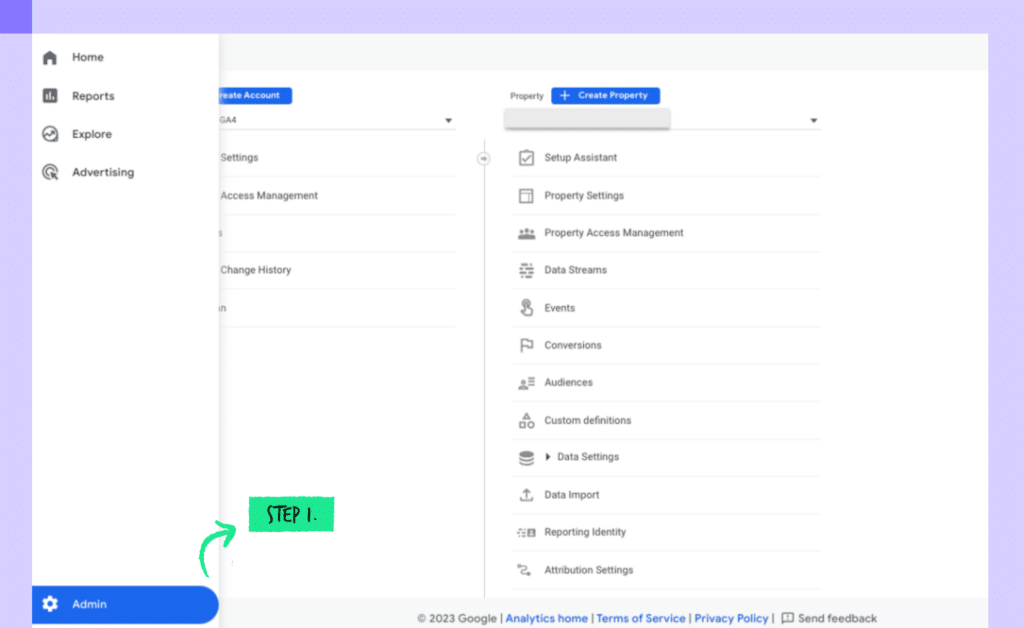
Step 2: Under the Property column, select Events.
Step 3: Click Create event.
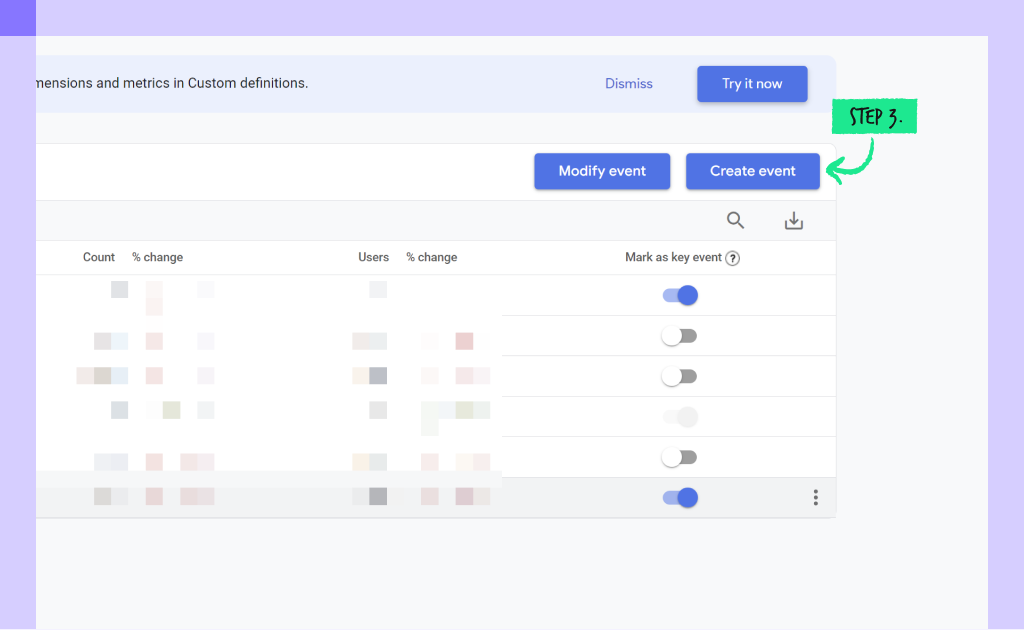
Note: GA4 automatically tracks events like page_view, scroll, and click. To track specific actions as conversions, creating new events is necessary.
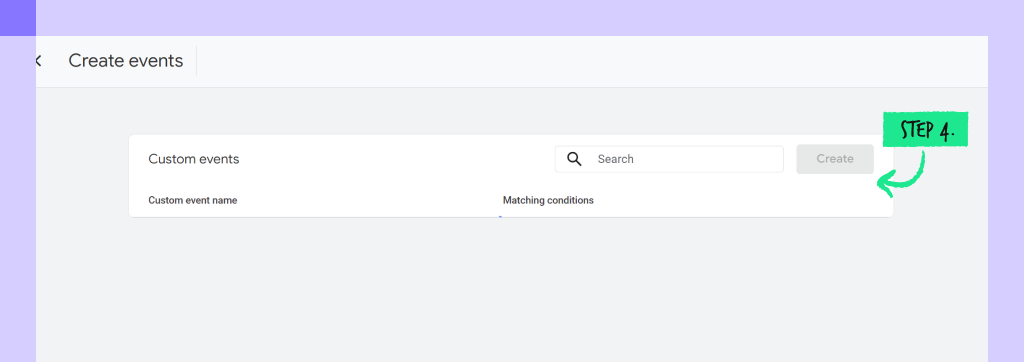
Step 4: Click Create.
Step 5: Complete the Configuration form.
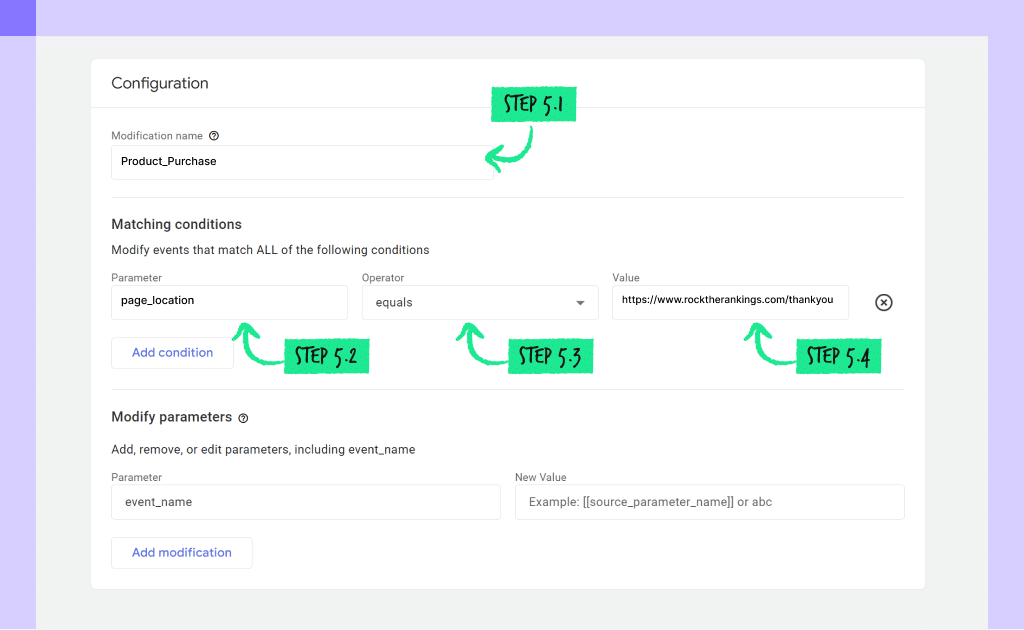
Step 5.1 Enter a Custom event name. This name will be used to mark the event as a conversion in step 8. Follow the convention of using underscores, for example, “Product_Purchase” for an eCommerce site.
Step 5.2 Select an event Parameter from the dropdown list. For instance, “page_location” can be used to track visits to a specific page like a thank you page after a form submission.
Step 5.3 Choose an Operator such as “equals” or “starts with”.
Note: Using “Equals” requires a precise match, whereas “Starts With” is more flexible and can accommodate variations like URL parameters.
Step 5.4 Enter a Value, for example, the URL of a “Thank You” page after a purchase.
Step 5.5 Ensure the Copy parameters from the source event checkbox remains selected.
Step 5.6 Click Save.
Step 5.7 Toggle Mark as conversion to the on position for the newly created event.
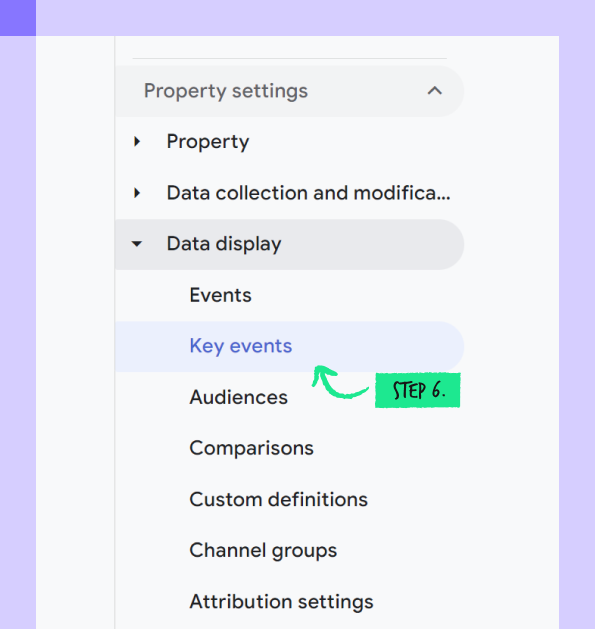
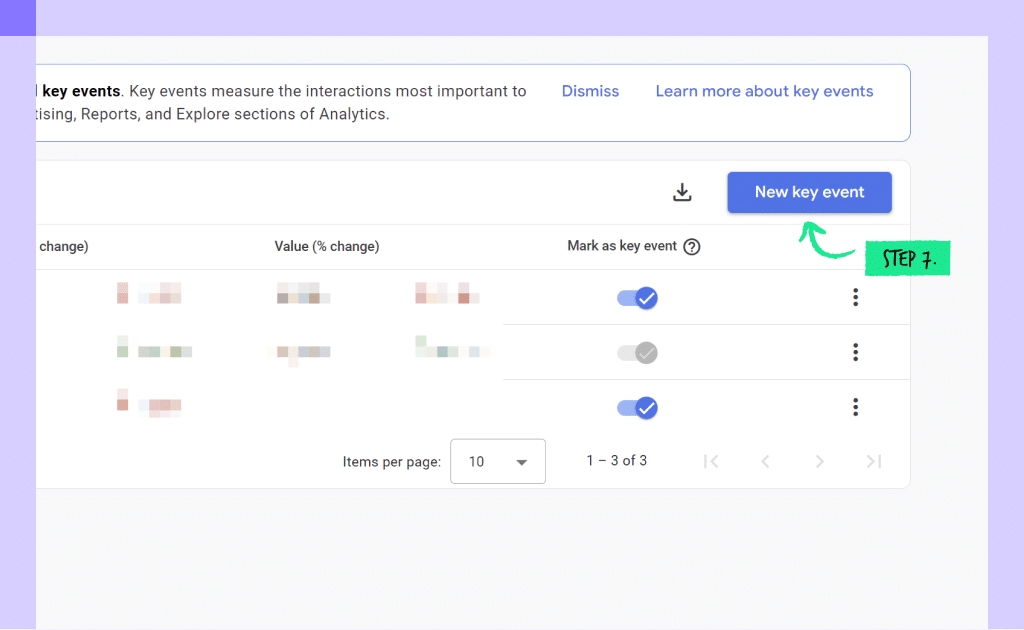
Step 6: Go back to the Property column and select Key Events under Events.
Step 7: Click New key event.
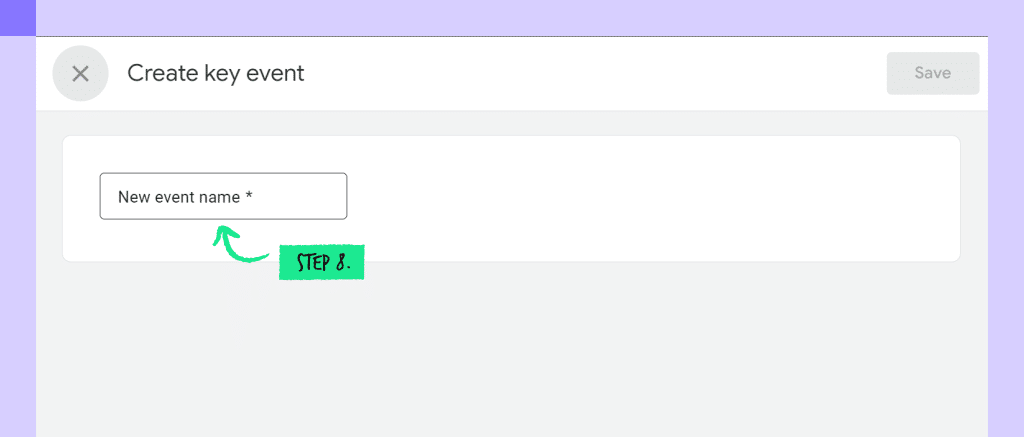
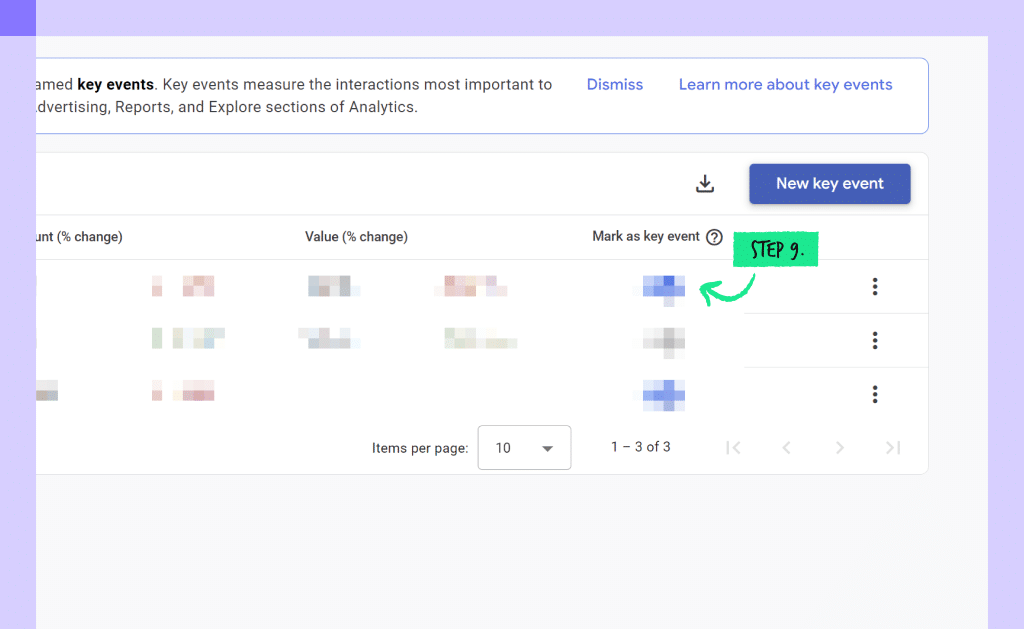
Step 8: Input the Event name used in step 5.1 and click Save. Ensure the Mark as conversion option is toggled to on.
Following these steps sets up your conversion event to begin tracking. Repeat this process for each conversion event you wish to measure.
You can access GA4’s built-in landing page report. This method is straightforward but not recommended for advanced users.
The data provided here is generally not sufficient, and this is a pre-built report that is already set up in GA4.
Additionally, as we’ll get into below – there are data tracking issues with it comes to the homepage, and missing information provided as (not set).
You can create a landing page report from scratch using the exploration report template within GA4.
The issue with this is the following:
The exploration report template provides more flexibility in terms of report creation, yet is limited by the data that can be shown.
Customize the existing ‘Pages and Screens’ report to include landing page data.
This is the preferred method and we’ll walk you through how to set this up in the following steps.
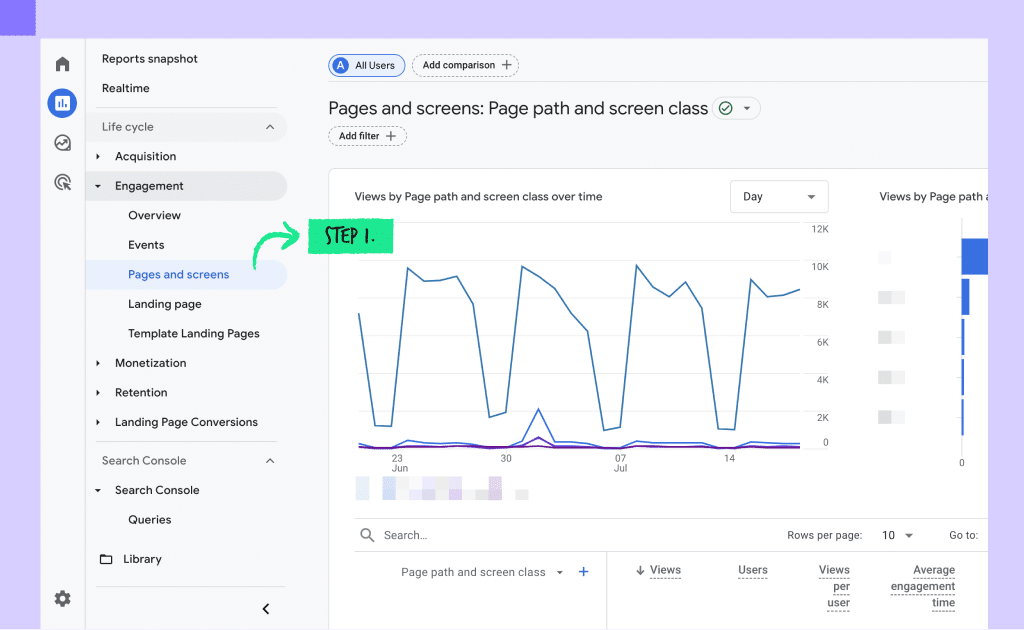
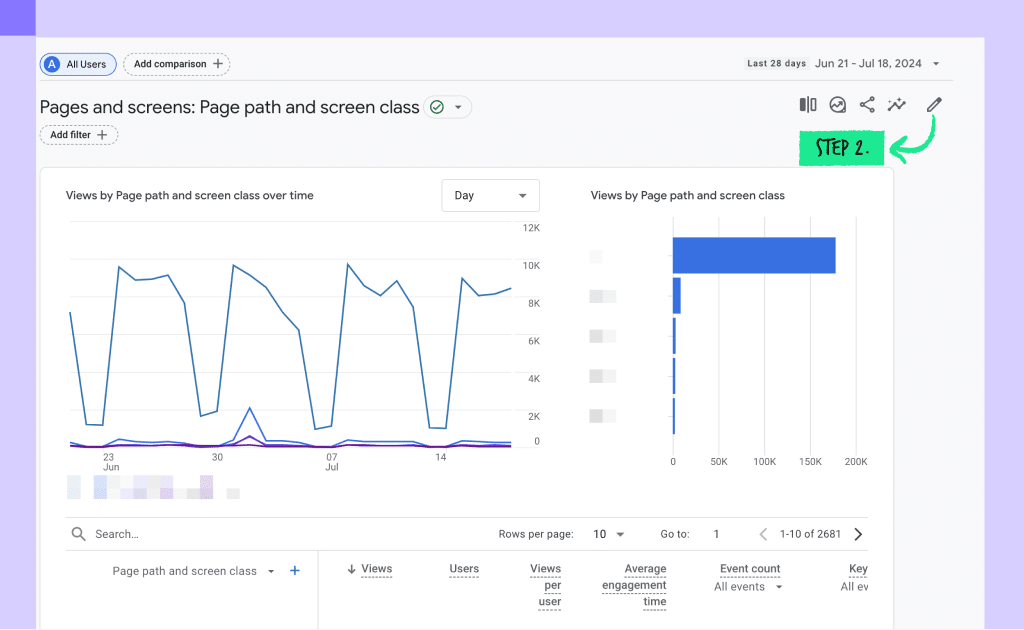
Step 1. Go to the ‘Pages and Screens’ report in GA4.
Step 2. Click on the pencil icon at the top-right corner of the screen to enable customization.
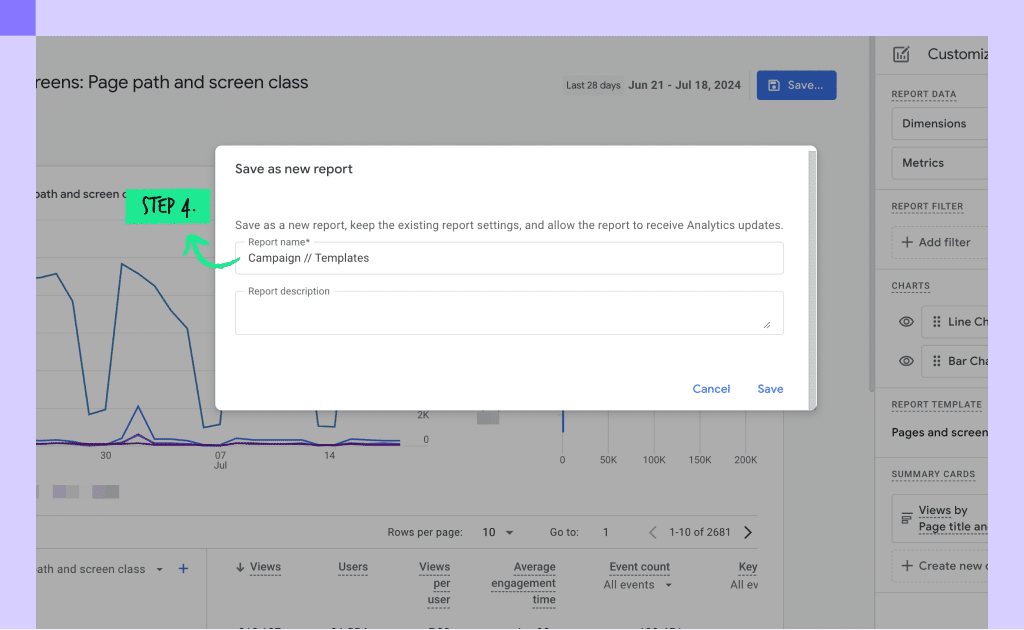
Step 3. Select ‘Save’ followed by ‘Save as a new report’ from the dropdown menu.

Step 4. Rename the new report and click the ‘Save’ button.
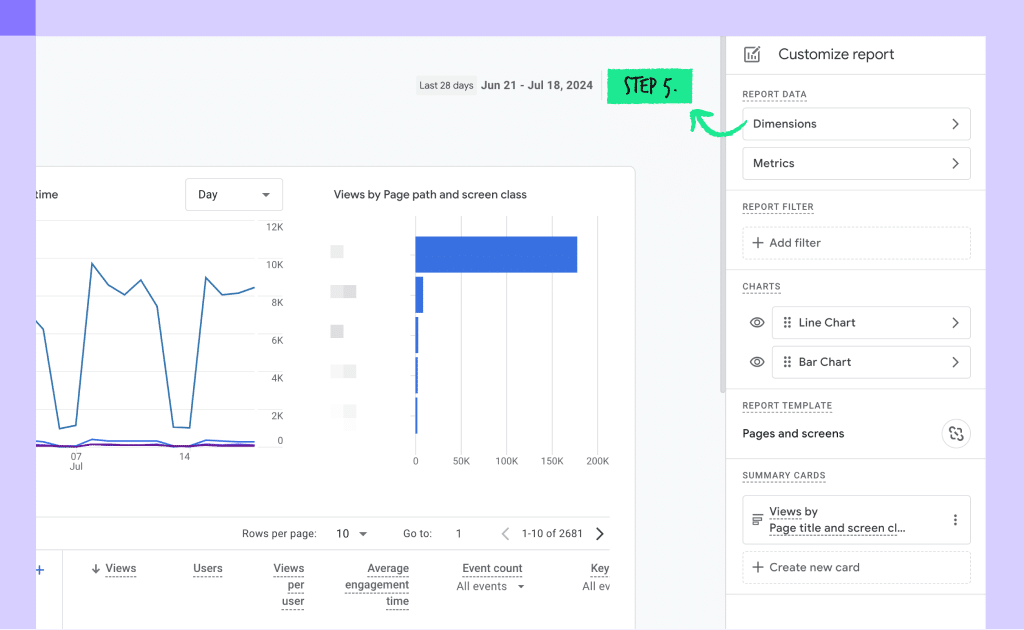
Step 5. Proceed by clicking on the ‘Dimensions’ button.
Step 6. Add a new dimension by clicking ‘Add dimension.’

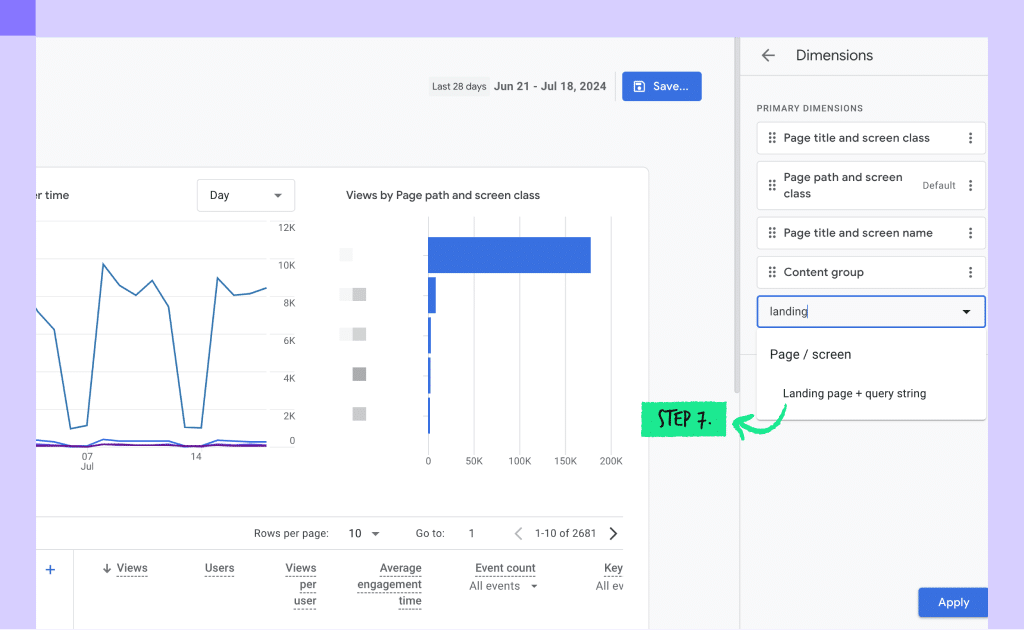
Step 7. Scroll to find the ‘Landing Page + query string’ dimension and add it.
Step 8. Set the ‘Landing Page + query string’ dimension as default by clicking the three-dot menu next to it and clicking on ‘Set as default.’
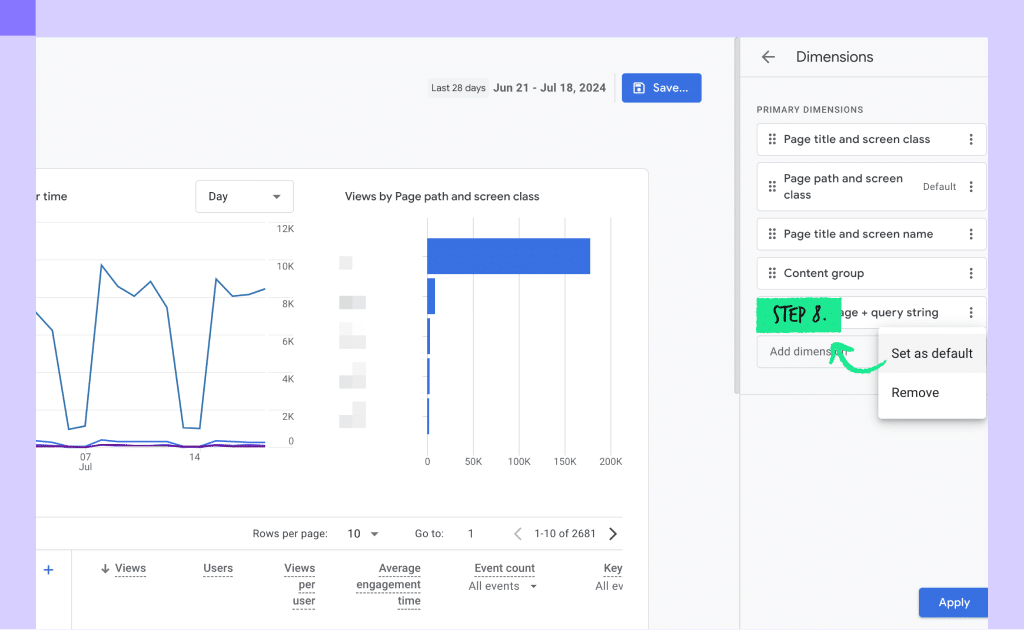
Step 9. Confirm the changes by clicking the ‘Apply’ button.

Step 9a. In order to see the user’s first touch, we can add an additional dimension to our reporting. Click on the ‘Plus’ icon next to the dimension ‘Landing page + query string’
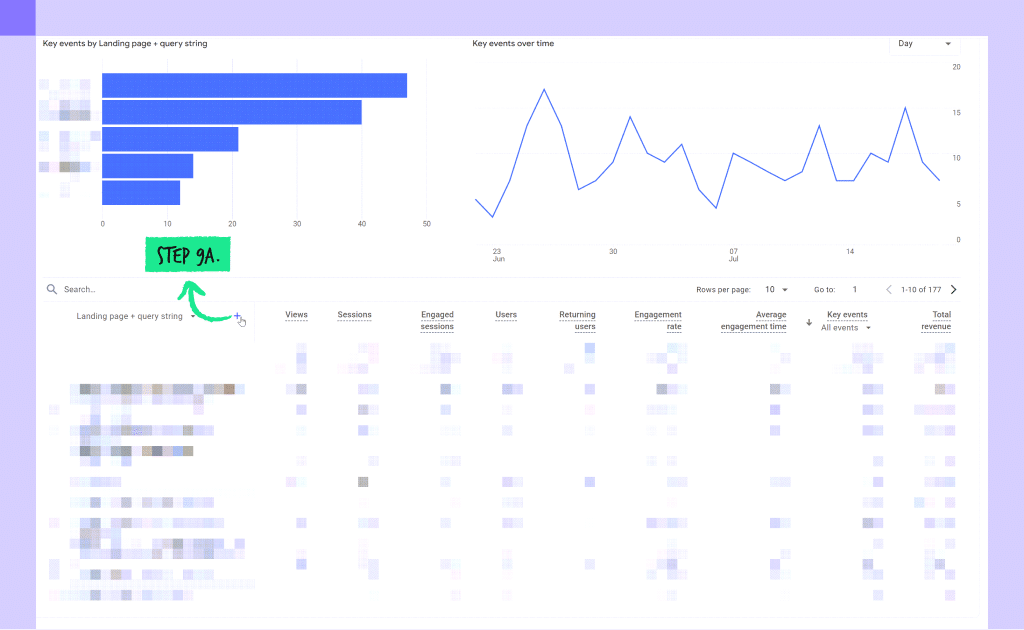
Step 9b. Search for ‘First user campaign’ and click on the result.

Step 10. Click on the ‘Metrics’ button.
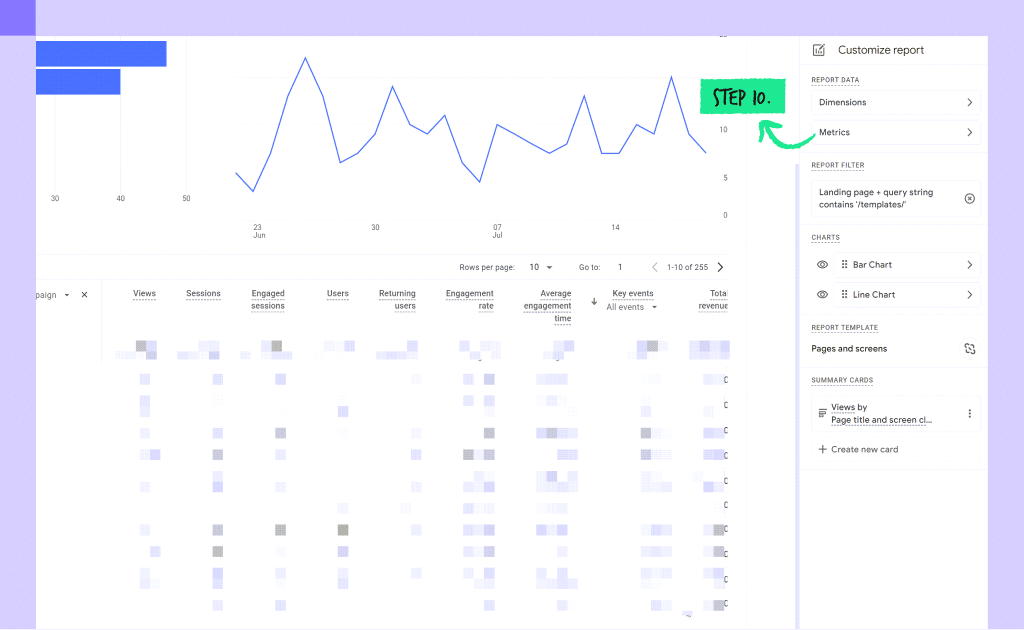
Step 11. Remove all metrics on the right-hand side by clicking on the ‘X’ button to remove.

Step 12. Add essential metrics by clicking ‘Add metric’ and include the following:
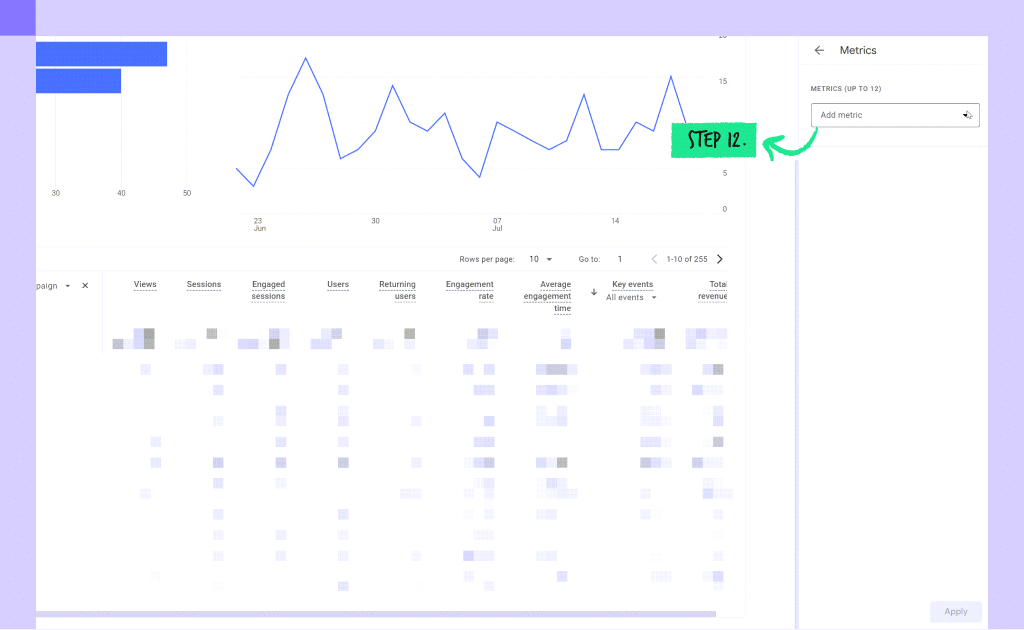
Step 13. Ensure that you’ve organized the metrics in the following order:
Note: Feel free to add in here any additional metrics that you’d find valuable to see in the reporting
Step 14. Click ‘Apply’.
Your report should now look as in the following screen:
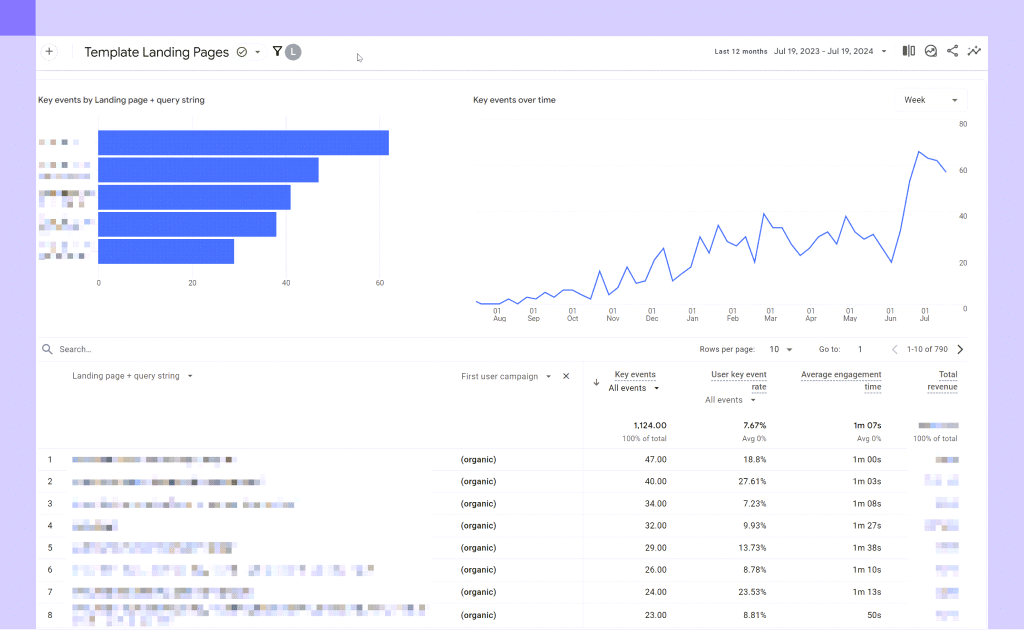
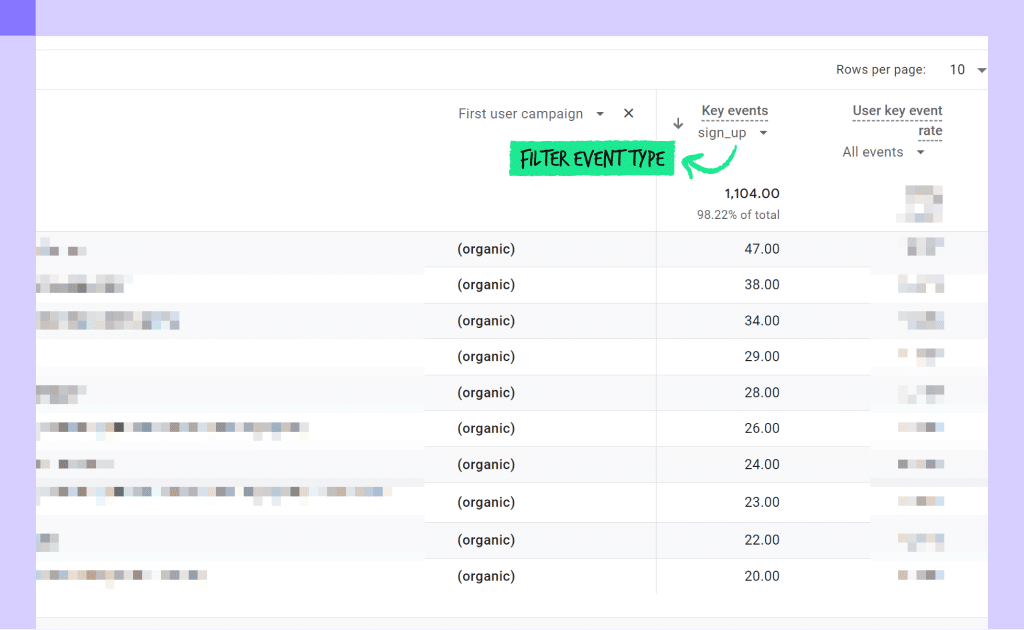
You can now filter based on ‘Key Events’ by clicking on the ‘Key Events‘ and selecting the event you want to filter by, i.e. in this case, we want to track total user product signups by landing page, so we’ll select the ‘Sign up’ key event to have a full breakdown by landing page:
To integrate the new ‘Landing Pages’ report with standard GA4 reports, it should be added to a collection.
Step 15. Refresh the report in the web browser.
Step 16. Go to the ‘Library’ tab and select ‘Edit collection’ under the ‘Life Cycle’ section.
Step 17. Search for the ‘Landing Pages’ report you created.
Step 18. Drag and drop the report under the ‘Engagement Overview’ section.
Step 19. Save the new arrangement.
Step 20. Return to the main menu by clicking the ‘Back’ button.
Now, the ‘Landing Pages’ report will be available under the ‘Engagement’ menu, providing comprehensive insights into metrics like views, sessions, engaged sessions, users, new users, returning users, engagement rate, and total revenue.
Attribution models play a crucial role in measuring the effectiveness of different marketing channels in Google Analytics 4 (GA4).
Each model assigns credit for conversions to touchpoints along a user’s journey, providing insights into both macro and micro conversions.
Depending on how credit is assigned, your reports can highlight different aspects of your advertising efforts and better inform your decisions.
GA4 offers three primary types of attribution models:
Within GA4, the default model is the data-driven model.
Benefits:
Drawbacks:
Selecting the right attribution model depends on various factors such as the type of traffic sources, the nature of campaigns, and the specific business goals. Here are a few considerations:
For Google Ads Campaigns:
For Organic Search and Cross-Channel Campaigns:
Your chosen attribution model can significantly impact how you interpret your marketing data.
By carefully considering these models and tailoring your reports, you can derive meaningful insights that drive effective decision-making.
You’ve now successfully configured your core conversion events in GA4 and can segment your landing pages based on conversion data.
Accurate reporting and attribution are crucial for proving your efforts, and with this guide, you’ll now have an easier way to showcase conversion and revenue progress directly within GA4.
Are you having trouble setting up conversion data and getting proper attribution for your content efforts?
We can help. Schedule a quick chat with our team, and we’ll get you set up to track your content and SEO efforts against real conversion-based metrics.
Founder of Rock The Rankings, an SEO partner that helps B2B SaaS brands crush their organic growth goals. An avid fan of tennis, and growing micro-SaaS businesses on the weekend. 2x SaaS Co-Founder – Currently working to build and scale Simple Testimonial.
Book a 1-on-1 intro call with our founder that includes a FREE custom marketing plan. Start growing faster, today.